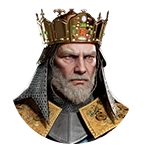
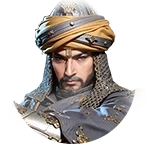
Alp Arslan + Charlemagne + Mehmed II (Archer · Bravery): verified 91.97 (S) build with 1→2→3 slot proof, 6-skill pool choices, Seal Ring & Adornment reasoning, close swaps, and 4-champion duel benchmarks.
91.97 / 100Meta Score (S)
26 / 39S8 League Wins
1,196,60260s Output Damage · Skill 95% · Normal 5%
44 sSurvival
12,98860s Recovery
+30% / +20%Unit +30% · Style +20%
⚔️ Full Max Ceiling vs Realistic Field Standard
🏆 Full Max Ceiling (Lv.50 5★ Ring · 3-Red Mount · Tier-20 · Red 5★ Gear)
91.97 / 100 · 1,196,602 DMG · 44 s
⚔️ Standard Field (Lv.30 3★ Ring · 2-Skill Mount · Tier-11 · Standard Mythic)
87.82 / 100 · 388,846 DMG · 60 s
Why This 1 → 2 → 3 Slot Order?
Leading with Alp Arslan in Slot 1 beats the strongest alternate hero permutation (Alp Arslan + Mehmed II + Charlemagne) by +4.43 points (91.97 vs. 87.54).
Slot 1 (Primary Commander — Alp Arslan): Mandatory Commander Slot because "War Lion's Roar" (Rage 250) only triggers in Position 1, anchoring all troop-scaled bursts, offensive Seal Ring multipliers, and the 51-pt primary Talent Tree.
Slot 2 (Tempo Bridge — Charlemagne): Bridges Slot 1 and Slot 3 in the 1 → 2 → 3 turn order, layering secondary damage, control, or mitigation without overlapping Slot 1's Ring budget.
Slot 3 (Sustain & Mitigation Anchor — Mehmed II): Stabilizes troop HP with recovery, damage reduction, and defensive Seal Ring / Adornment passives so Slot 1's troop-scaled damage stays high past 60s.
Why Skills: Selected via paired stochastic simulations across Alp Arslan's 6-skill pool as the conflict-free pair delivering the highest net 60s damage and survivability.
Rule note: Each hero owns an independent 6-skill pool across marches — equipping a pool skill such as Bloodthirst in one march never locks it out from another hero's march. Only Seal Rings (max 1 per account) and Tier-20 Silver Moon Rein uniqueness constraints apply across slots.
Why Signet Ring: Effulgent Sun amplifies Commander Rage cycling and opening active multipliers on Slot 1 while guaranteeing all 3 rings in the march remain unique.
🛡️ Mount Adornment (Lv.60):Eagle's Blessing — ✨ Power Accumulation (For the first 18s after entering battle, reduces your damage taken by 4.95% and recovers rage by an extra 1 every second (when multiple heroes have learned this skill, only one will take effect).)
Why Mount & Adornment: Selected via joint 5-axis optimization to amplify primary carry skill/normal damage scaling during opening burst windows.
Why Skills: Selected specifically to unlock extra trigger windows, defense shred, and team buff synergy without colliding with Slot 1/3 debuff groups — outperforming raw solo fillers in Charlemagne's pool.
Rule note: Each hero owns an independent 6-skill pool across marches — equipping a pool skill such as Bloodthirst in one march never locks it out from another hero's march. Only Seal Rings (max 1 per account) and Tier-20 Silver Moon Rein uniqueness constraints apply across slots.
Why Signet Ring: Tranquil Water grants unconditional all-damage reduction on support/enabler slots while reserving primary offensive rings for Slot 1 (max 1 copy per account).
🛡️ Mount Adornment (Lv.60):Eagle's Blessing — ✨ Blood Rage (When your units in troop fall below 50% of the max amount for the first time in battle, gains 30.1 rage immediately. Triggers at most once every 30s (when multiple heroes have learned this skill, only one will take effect).)
Why Mount & Adornment: Joint Tack + Sub-Effect Optimization: Defensive Lv.60 Adornment beat Offensive alternatives in full-round-robin tests by keeping troop-scaled damage intact longer.
Why Skills: Maintains high troop HP and universal damage reduction throughout 60s–180s fights so the primary commander's troop-scaled hits never collapse early; short burst alternatives drop win rate in long duels.
Rule note: Each hero owns an independent 6-skill pool across marches — equipping a pool skill such as Bloodthirst in one march never locks it out from another hero's march. Only Seal Rings (max 1 per account) and Tier-20 Silver Moon Rein uniqueness constraints apply across slots.
Why Signet Ring: Celestial Spark converts attack cadence and secondary strikes into extra bonus skill hits without competing with Slot 1's primary ring.
🔴 1-Red Skill Priority: Bedrock · 🟠 2-Skill Mount Pair (1 Red + 1 Orange): Bedrock + Peacemaker
Best 2nd Red Mount:Inky Snow · Best Orange Mount (Skylark):Paladin
🛡️ Mount Adornment (Lv.60):Eagle's Blessing — ✨ Resistance (For the first 18.0s in battle, the first 3 instances of skill damage taken reduces by 15.01% each, and damage taken reduces by 10.1%. After 18.0s, all damage taken reduces by 4.95%.)
Why Mount & Adornment: Resistance (#28): Cuts early incoming skill burst by -15.01% (first 3 hits in 18s) and global damage afterward, stabilizing the mid/support slot through opening nukes.
Why are Alp Arslan, Charlemagne, and Mehmed II ordered 1 → 2 → 3 in this squad?
Alp Arslan anchors Slot 1 to fire the primary Commander Skill and 51-point Talent Tree, Charlemagne runs Slot 2 tempo/enablers, and Mehmed II anchors Slot 3 to sustain the march or wrap next-hero buffs directly back to Alp Arslan (score 91.97).
Does equipping these pool skills affect my other marches on the map?
No for pool skills: each hero has an independent 6-skill pool. Across your marches, only unique Seal Rings (Effulgent Sun, Tranquil Water, Celestial Spark; max 1 per account) and Tier-20 Silver Moon Rein uniqueness constraints apply.
Why are Seal Rings (Effulgent Sun, Tranquil Water, Celestial Spark) and Lv.60 Mount Adornments selected for this Archer build?
Joint 5-axis optimization pairs Effulgent Sun (Slot 1), Tranquil Water (Slot 2), and Celestial Spark (Slot 3) with zero ring duplication alongside matching Tier-20 Adornment effects (Power Accumulation, Blood Rage, Resistance) for top Archer performance.
Updated: 16.11.26 (data: 2026-11-13). Last updated: 2026-11-18
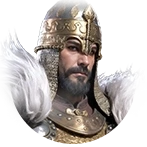 Alp Arslan Archer · Bravery