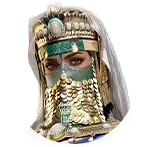
Alp Arslan + Bellevue + Shajar al-Durr (Archer · Bravery): verified 96.73 (S+) build with 1→2→3 slot proof, 6-skill pool choices, Seal Ring & Adornment reasoning, close swaps, and 4-champion duel benchmarks.
96.73 / 100Meta Score (S+)
690,71160s Output Damage · Skill 91% · Normal 9%
60 sSurvival
21,49260s Recovery
+30% / +30%Unit +30% · Style +30%
Why This 1 → 2 → 3 Slot Order?
Leading with Alp Arslan in Slot 1 beats the strongest alternate hero permutation (Alp Arslan + Shajar al-Durr + Bellevue) by +5.80 points (96.73 vs. 90.93).
Slot 1 (Primary Commander — Alp Arslan): Mandatory Commander Slot because "War Lion's Roar" (Rage 250) only triggers in Position 1, anchoring all troop-scaled bursts, offensive Seal Ring multipliers, and the 51-pt primary Talent Tree.
Slot 2 (Tempo Bridge — Bellevue): Bridges Slot 1 and Slot 3 in the 1 → 2 → 3 turn order, layering secondary damage, control, or mitigation without overlapping Slot 1's Ring budget.
Slot 3 (Sustain & Mitigation Anchor — Shajar al-Durr): Stabilizes troop HP with recovery, damage reduction, and defensive Seal Ring / Adornment passives so Slot 1's troop-scaled damage stays high past 60s.
Why Skills: Selected via paired stochastic simulations across Alp Arslan's 6-skill pool as the conflict-free pair delivering the highest net 60s damage and survivability.
Rule note: Each hero owns an independent 6-skill pool across marches — equipping a pool skill such as Bloodthirst in one march never locks it out from another hero's march. Only Seal Rings (max 1 per account) and Tier-20 Silver Moon Rein uniqueness constraints apply across slots.
Why Signet Ring: Effulgent Sun amplifies Commander Rage cycling and opening active multipliers on Slot 1 while guaranteeing all 3 rings in the march remain unique.
🐎 Warhorse Breed & 3× Lv.10 Traits:Desert Wind (Dustbane · Army Sunder · Overpower) 🛡️ Mount Adornment (Lv.60):Gleaming Arrow — ✨ War Prep (When entering battle, if your units exceed 80% of deployment capacity, the mounted hero's all damage increases by 20% for 12s (effective once every 30s at most).)
Why Mount & Adornment: Selected via joint 5-axis optimization to amplify primary carry skill/normal damage scaling during opening burst windows.
Why Skills: Selected via paired stochastic simulations across Bellevue's 6-skill pool as the conflict-free pair delivering the highest net 60s damage and survivability.
Rule note: Each hero owns an independent 6-skill pool across marches — equipping a pool skill such as Bloodthirst in one march never locks it out from another hero's march. Only Seal Rings (max 1 per account) and Tier-20 Silver Moon Rein uniqueness constraints apply across slots.
🐎 Warhorse Breed & 3× Lv.10 Traits:Carnelian Chariot (Fearless · Peacemaker · Bedrock) 🛡️ Mount Adornment (Lv.60):Eagle's Blessing — ✨ Eye of the Storm (After the mounted hero activates secondary strike skills, deals additional damage to the attack target (damage rate: 60%, might bonus, up to once every 3s).)
Why Mount & Adornment: Joint Tack + Sub-Effect Optimization: Defensive Lv.60 Adornment beat Offensive alternatives in full-round-robin tests by keeping troop-scaled damage intact longer.
Why Skills: Maintains high troop HP and universal damage reduction throughout 60s–180s fights so the primary commander's troop-scaled hits never collapse early; short burst alternatives drop win rate in long duels.
Rule note: Each hero owns an independent 6-skill pool across marches — equipping a pool skill such as Bloodthirst in one march never locks it out from another hero's march. Only Seal Rings (max 1 per account) and Tier-20 Silver Moon Rein uniqueness constraints apply across slots.
Why Signet Ring: Skyward Knight won the joint 3-slot ring permutation test across all 4 unit champions while preserving account-unique ring rules (max 1 per type).
🐎 Warhorse Breed & 3× Lv.10 Traits:Red Hare (Lifesaver · Fearless · Bedrock) 🛡️ Mount Adornment (Lv.60):Eagle's Blessing — ✨ Resistance (For the first 18.0s in battle, the first 3 instances of skill damage taken reduces by 15.01% each, and damage taken reduces by 10.1%. After 18.0s, all damage taken reduces by 4.95%.)
Why Mount & Adornment: Resistance (#28): Cuts early incoming skill burst by -15.01% (first 3 hits in 18s) and global damage afterward, stabilizing the mid/support slot through opening nukes.
Daisy (#302) on Slot 1 triggers at 30% chance while moving #212 to Slot 3 — easy to field across multiple marches, but noticeably trails 5★ BiS in 1v1 duels.
Why are Alp Arslan, Bellevue, and Shajar al-Durr ordered 1 → 2 → 3 in this squad?
Alp Arslan anchors Slot 1 to fire the primary Commander Skill and 51-point Talent Tree, Bellevue runs Slot 2 tempo/enablers, and Shajar al-Durr anchors Slot 3 to sustain the march or wrap next-hero buffs directly back to Alp Arslan (score 96.73).
Does equipping these pool skills affect my other marches on the map?
No for pool skills: each hero has an independent 6-skill pool. Across your marches, only unique Seal Rings (Effulgent Sun, Lofty Mountain, Skyward Knight; max 1 per account) and Tier-20 Silver Moon Rein uniqueness constraints apply.
Why are Seal Rings (Effulgent Sun, Lofty Mountain, Skyward Knight) and Lv.60 Mount Adornments selected for this Archer build?
Joint 5-axis optimization pairs Effulgent Sun (Slot 1), Lofty Mountain (Slot 2), and Skyward Knight (Slot 3) with zero ring duplication alongside matching Tier-20 Adornment effects (War Prep, Eye of the Storm, Resistance) for top Archer performance.
Updated: 16.11.26 (data: 2026-11-13). Last updated: 2026-11-17
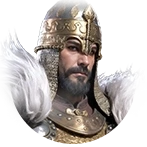 Alp Arslan Archer · Bravery